Jun 24, 2010
Been busy - riding about, doing small jobs. After weeks of waiting for parts to arrive, now I'm rushing to get everything done. Still waiting on a few things, but expecting them next week.
Riding about because its fun, and to test out chain guard, and find what wants to work loose. I think the chain guard is a winner. Looking at the amount of mud/sand/water splashing on the outside and on my feet, the chain is as clean as when it went on.
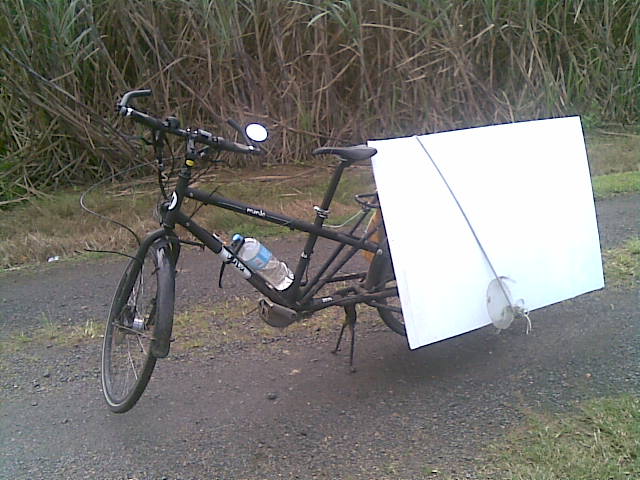
I've been after some Corflute for a while. Haven't found anyone that sells it up here, but today, out riding I found some. A large sheet too! Today was windy. It was interesting riding home with this sheet - it alternated between anchor and sail modes. Most of the way was anchor :( Glad for the Yuba - was easy to tie it on the back - and pedal. Would have held it and rode one handed on the MTB. Go Yuba!!!

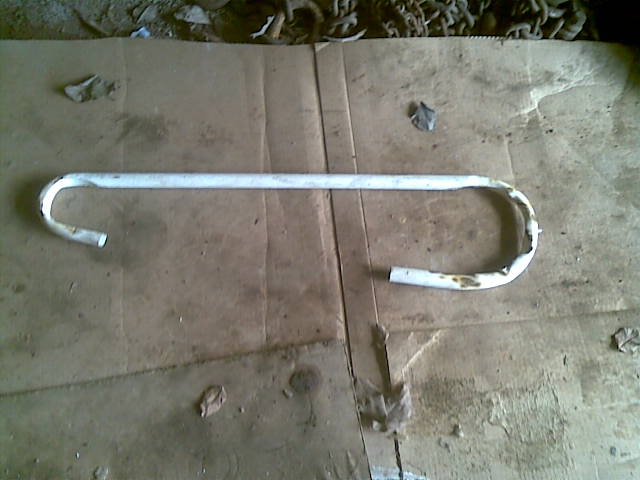
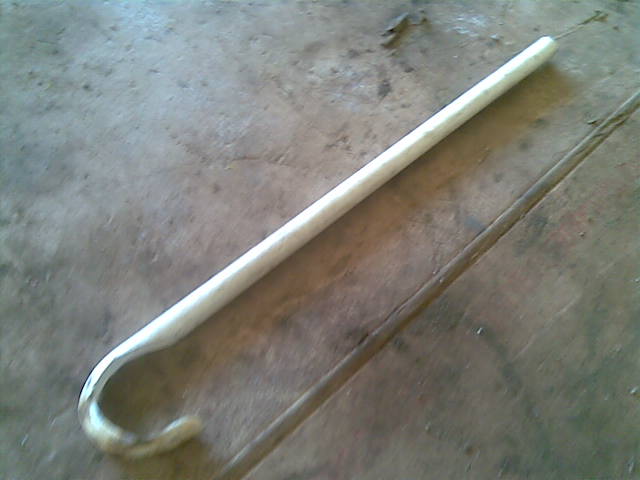
Also acquired a piece of aluminium (6x60x300mm) and spent time on the hacksaw and file. Made one spanner for the headset bolts. The reason for the 'h' shape, is that I want to have a thick handle on the other spanner to use as a chain whip. 3 tools from one bit of aluminium. With these tools, I can do all maintenance and repairs. A wide jaw 6" shifter opens wide enough to go over the bottom bracket socket. It will also work on the Rohloff sprocket nut, and all other nuts on the bike.
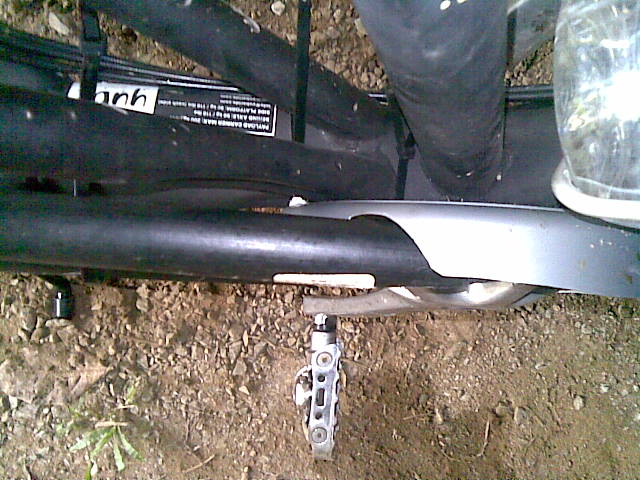
I've also found the right tension spring for the
deflopilator. Its not the length that was important - its the tension - enough to pull the fork to center, but still have enough stretch to let the forks turn as far as you need them to, without over stretching the spring. Its on now, but will change the mount when I get a longer bolt. I'm not keen on rusty bolts - so all the bolts that I'm responsible for are marine grade stainless steel socket heads. Makes life easy - no rust, and Allen keys. There are a couple of bolts with nuts on the end - the front mudguard and light mount is one. New bolt is on order.
While wandering about the hardware shop for the spring, I found right angle grease nipples. Going to fit these on the end of my pedals to lubricate the pedal bearings. This will involve drilling a hole, and tapping the plastic cover that hides the nut at the end of the pedal axle. One of tomorrows tasks.
Comments:
Date: 2010-06-25 14:59
Author: John
Great stuff Megan. Keep it coming. Your post made me think of a trick I used long ago to grease pedals. Just posted it on my blog. Cheers, John
Jun 22, 2010

Chain is well covered now. From the chain ring to near the rear cog. The top tube does not rub on the chain or the cogs. The chain does rub on the bottom. Can't hear it from the saddle though.
Rode a few km on this trying to hit every puddle and mud spot I could find. So far its going okay. Going to hit some dirt roads tomorrow. Corrugations, clay soil, and with the rain up here, will be good an messy. A chance to see what is going to work loose, and if the chain guard really does that much for keeping the chain clean. It does keep the chain of long pants though.

Still tossing up if to mount a basket on the front, or not.
Tried a few more options for the deflopilator. Not really happy with that still. Its not the flopping that is the problem - its the light being hit. Getting a longer bolt to place a metal bracket around the light.
View looking down.
Comments:
Date: 2010-06-25 08:06
Author: Mr Colostomy
I'd go for the basket, I have one on my non-Yuba and whenever I am on the Yuba I miss it quite a bit.
Date: 2010-06-25 17:50
Author: Megan Webb
I'd like a basket, but my handle bars don't seem to have much space. My current thinking is to use the two bolts and attach two small buckets(?) to the sides under the handle bar. This will give me space for small items and not interfere with the light, or with me seeing the front wheel.
Jun 19, 2010
Clocked up 40km today - would have done more, but the bottom bracket was unwinding itself and of all the tools I took with me, I didn't take the crank puller and bottom bracket socket.
Found that I need something on the top chain run - to stop the chain bouncing off on big bumps.
The front wheel needs the
deflopilator
. Annoyingly the front light provides the stop at the moment. I don't want to break the light. Bought a spring - but found it was too stretchy when I mounted it.. Will return it Monday and try the stiffer one that I discounted as being too stiff. I'll also add a bracket around the light, to stop it hitting the frame - if the fork does turn around.
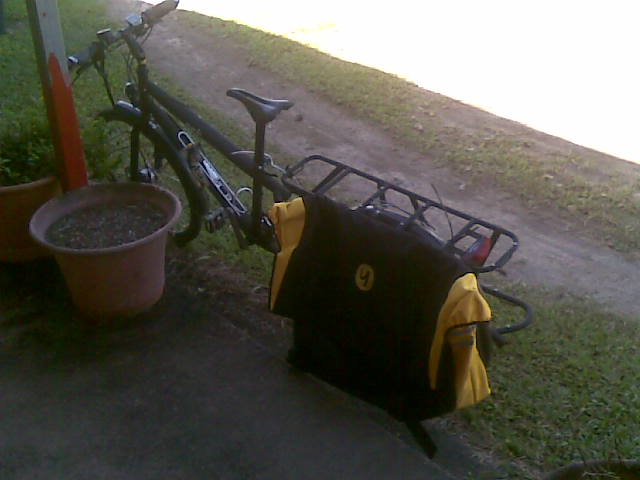
The Go-Getter bag is great. It swallows everything - from a bucket, to lengths of pipe. I did mess up a few tight spots and scraped wide loaders or the bag. That will resolve itself as I get used to the extra length. Not surprisingly I found that I couldn't bunny hop.
Jun 18, 2010
My quick ride the other day was as a single speed. Decided today to quickly fix the gear changer and work that Rohloff. In a common story, it took way longer than I thought it would. The cable outers for the gear changer ended up being 1870mm long. Easy to cut them - used side cutters and then filed them flat. The liners - scissors. Cutting the inners was hard. The two pairs of side cutters in the shed both didn't want to cut. They mushed and chewed. I thought about using a pair of scissors, but ended up using the grinder. It wasn't the best and I wished for proper cutters. I'm thinking to either buy a pair and carry them with me, or better yet, find a bike shop to precut some inners to the length I need. Arrggh - to do that I'd need to take the cables out and measure them. I don't know how much is inside the twist shifter. So, next time I have to change a cable - I'll try and remember to measure then, and then get them cut to length.
Sadly I had to put a side the nice thick tubed handle bar from Yuba. By the time the brake lever, shifter, and a small bit of grip went on, there was no space left for the bar ends. I did like the extra rise it gave. Used the old bar I had, but will look to replace it with a steel tube sometime. I through on the lights, and old mud guards, adjusted the seat height, and headed out for a longer ride.
The brakes are starting to feel better. The front ended up getting some washers between the fork and the caliper to space it out far enough to adjust correctly. The rear by careful design by me (yeah right! - pull the other one.) was spot on - no spacers needed. By the time the rear hose was routed, it was okay for length. The front hose is really too long. I'll wait until I'm at a shop to shorten it. I don't want to risk not having a brake here.
The Yuba cargo bag goes on well. I was going to keep the space look to the frame, but now I'll find something to place on the sides and wide loaders. I want to try and stop lots of mud hitting the bags as I'll end up unclipped them and carrying them into the tent.
First trip - to the post office to collect the mail. Picture above is outside the post office.
How does it ride on the road - really good. Lots of gears - though didn't need any of the low gears here. Need to find some hills to test that out.
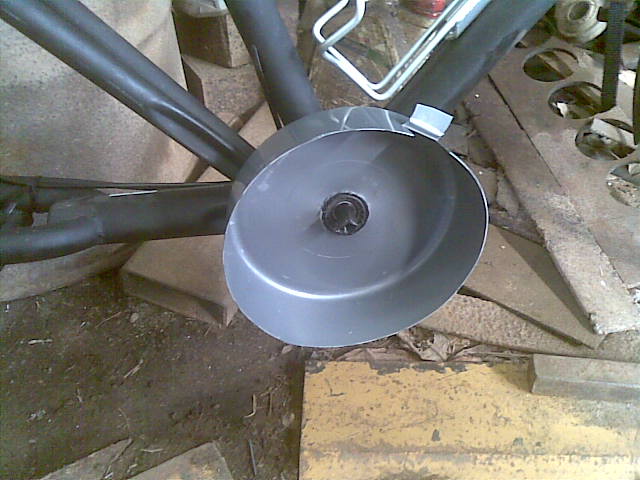
After riding about for a bit, I then returned to the chain guard. I need to replace my grandmothers bucket tomorrow. I cut the bottom off it and placed it over the crank. I cut to more slots out to enable the base to sit as flat as possible against the frame (See the photo below). Its held in with two cable ties. Ideally, the distance up from the bottom of the bucket would be the same all the way around, but because the bucket is a bit soft, it doesn't sit vertically. I put the crank on, and slowly cut bits off until it could turn freely. Just cut anything that hits the crank arm.
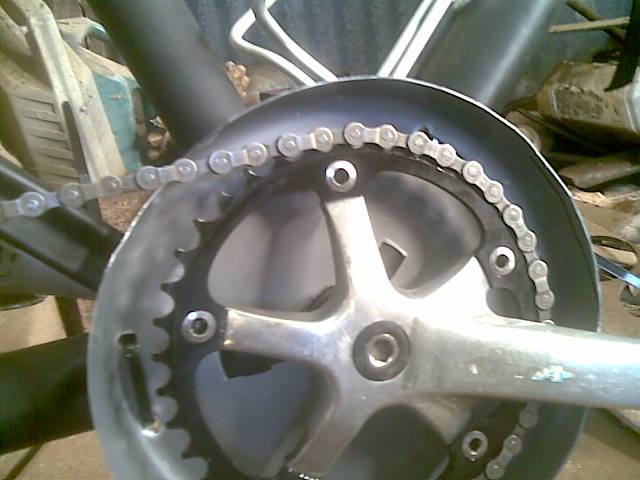
On the photo on the right, you can see the slots cut on the back, to help the base sit flat. Cut some slots for the chain and it was done. Tomorrow I'll sort out the chain runs. Going to go look at poly tubing again.
The guard isn't finished yet. I want to place a disk (I didn't want to upset people by taking another bucket) over the outside of the crank - so there is less of a gap, and to help that bit more with keeping pants clean. I tried with some long slacks on, it does a good job of keeping pants from the chain as it is. The bucket should be cheap - a harder plastic bowl may be better. Now I have a template to start with. I'm still thinking of other options. See what occurs to me tomorrow. I'll be going on a longer ride to the local town. Will be about 30+km round trip. Thinking time, and see how the bucket holds up.
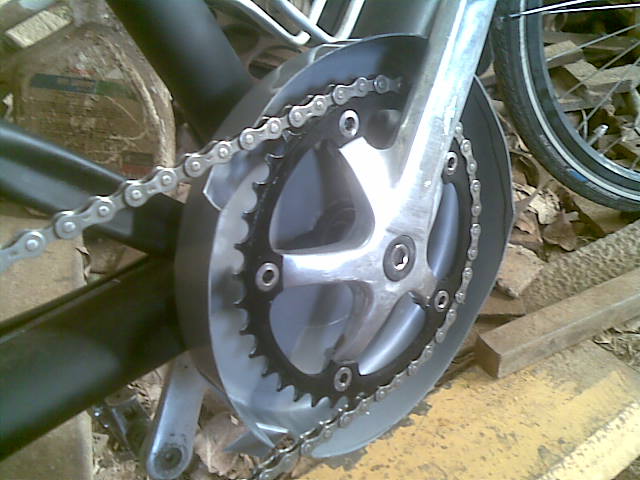
Heres another shot - it does look like it would do a wonderful job of keeping water/mud from the front wheel off the chain. Probably need to paint it - I'm not sure how long it would last in the sun otherwise. Depending how long, and the cost of a bucket, it might stay the way it is.
Jun 17, 2010
Not really a lot happened to day. I hunted for some pipe for the chain guard, and mud guards. The large diameter pipe tents to be heavy because of the thicker walls. Didn't get that.
The chain guard - ended up trying electrical conduit. I wanted a tube over the top chain run, and the bottom. Spent most of the day heating, bending, filing, assembling and disassembling the chain. I don't want the chain guard rubbing on the hub. With careful bending and filing - I did acheive that, and still had the tube bending in to enclose the chain. I think this was a waste of effort now. It took a long time, and really doesn't do that much for the guard.
The initial try had a bend on both ends. The conduit has some flex - but the problem was getting the chain linked up. I find it easier to link the chain on the chain ring. This didn't allow that.
I chopped the front off - and shortened the back. But not sure if I'm happy with it at the moment.
I experimented with using just floating pipes over the two chain runs. Thinking about doing that, and leaving the chain ring free. Also thinking of other ways to cover the chain ring up.
I have access to brazing gear and was going to add tabs on for the guard. But now, thinking to cable tied it on only until I'm sure. I'll sleep on it tonight and have another look tomorrow.