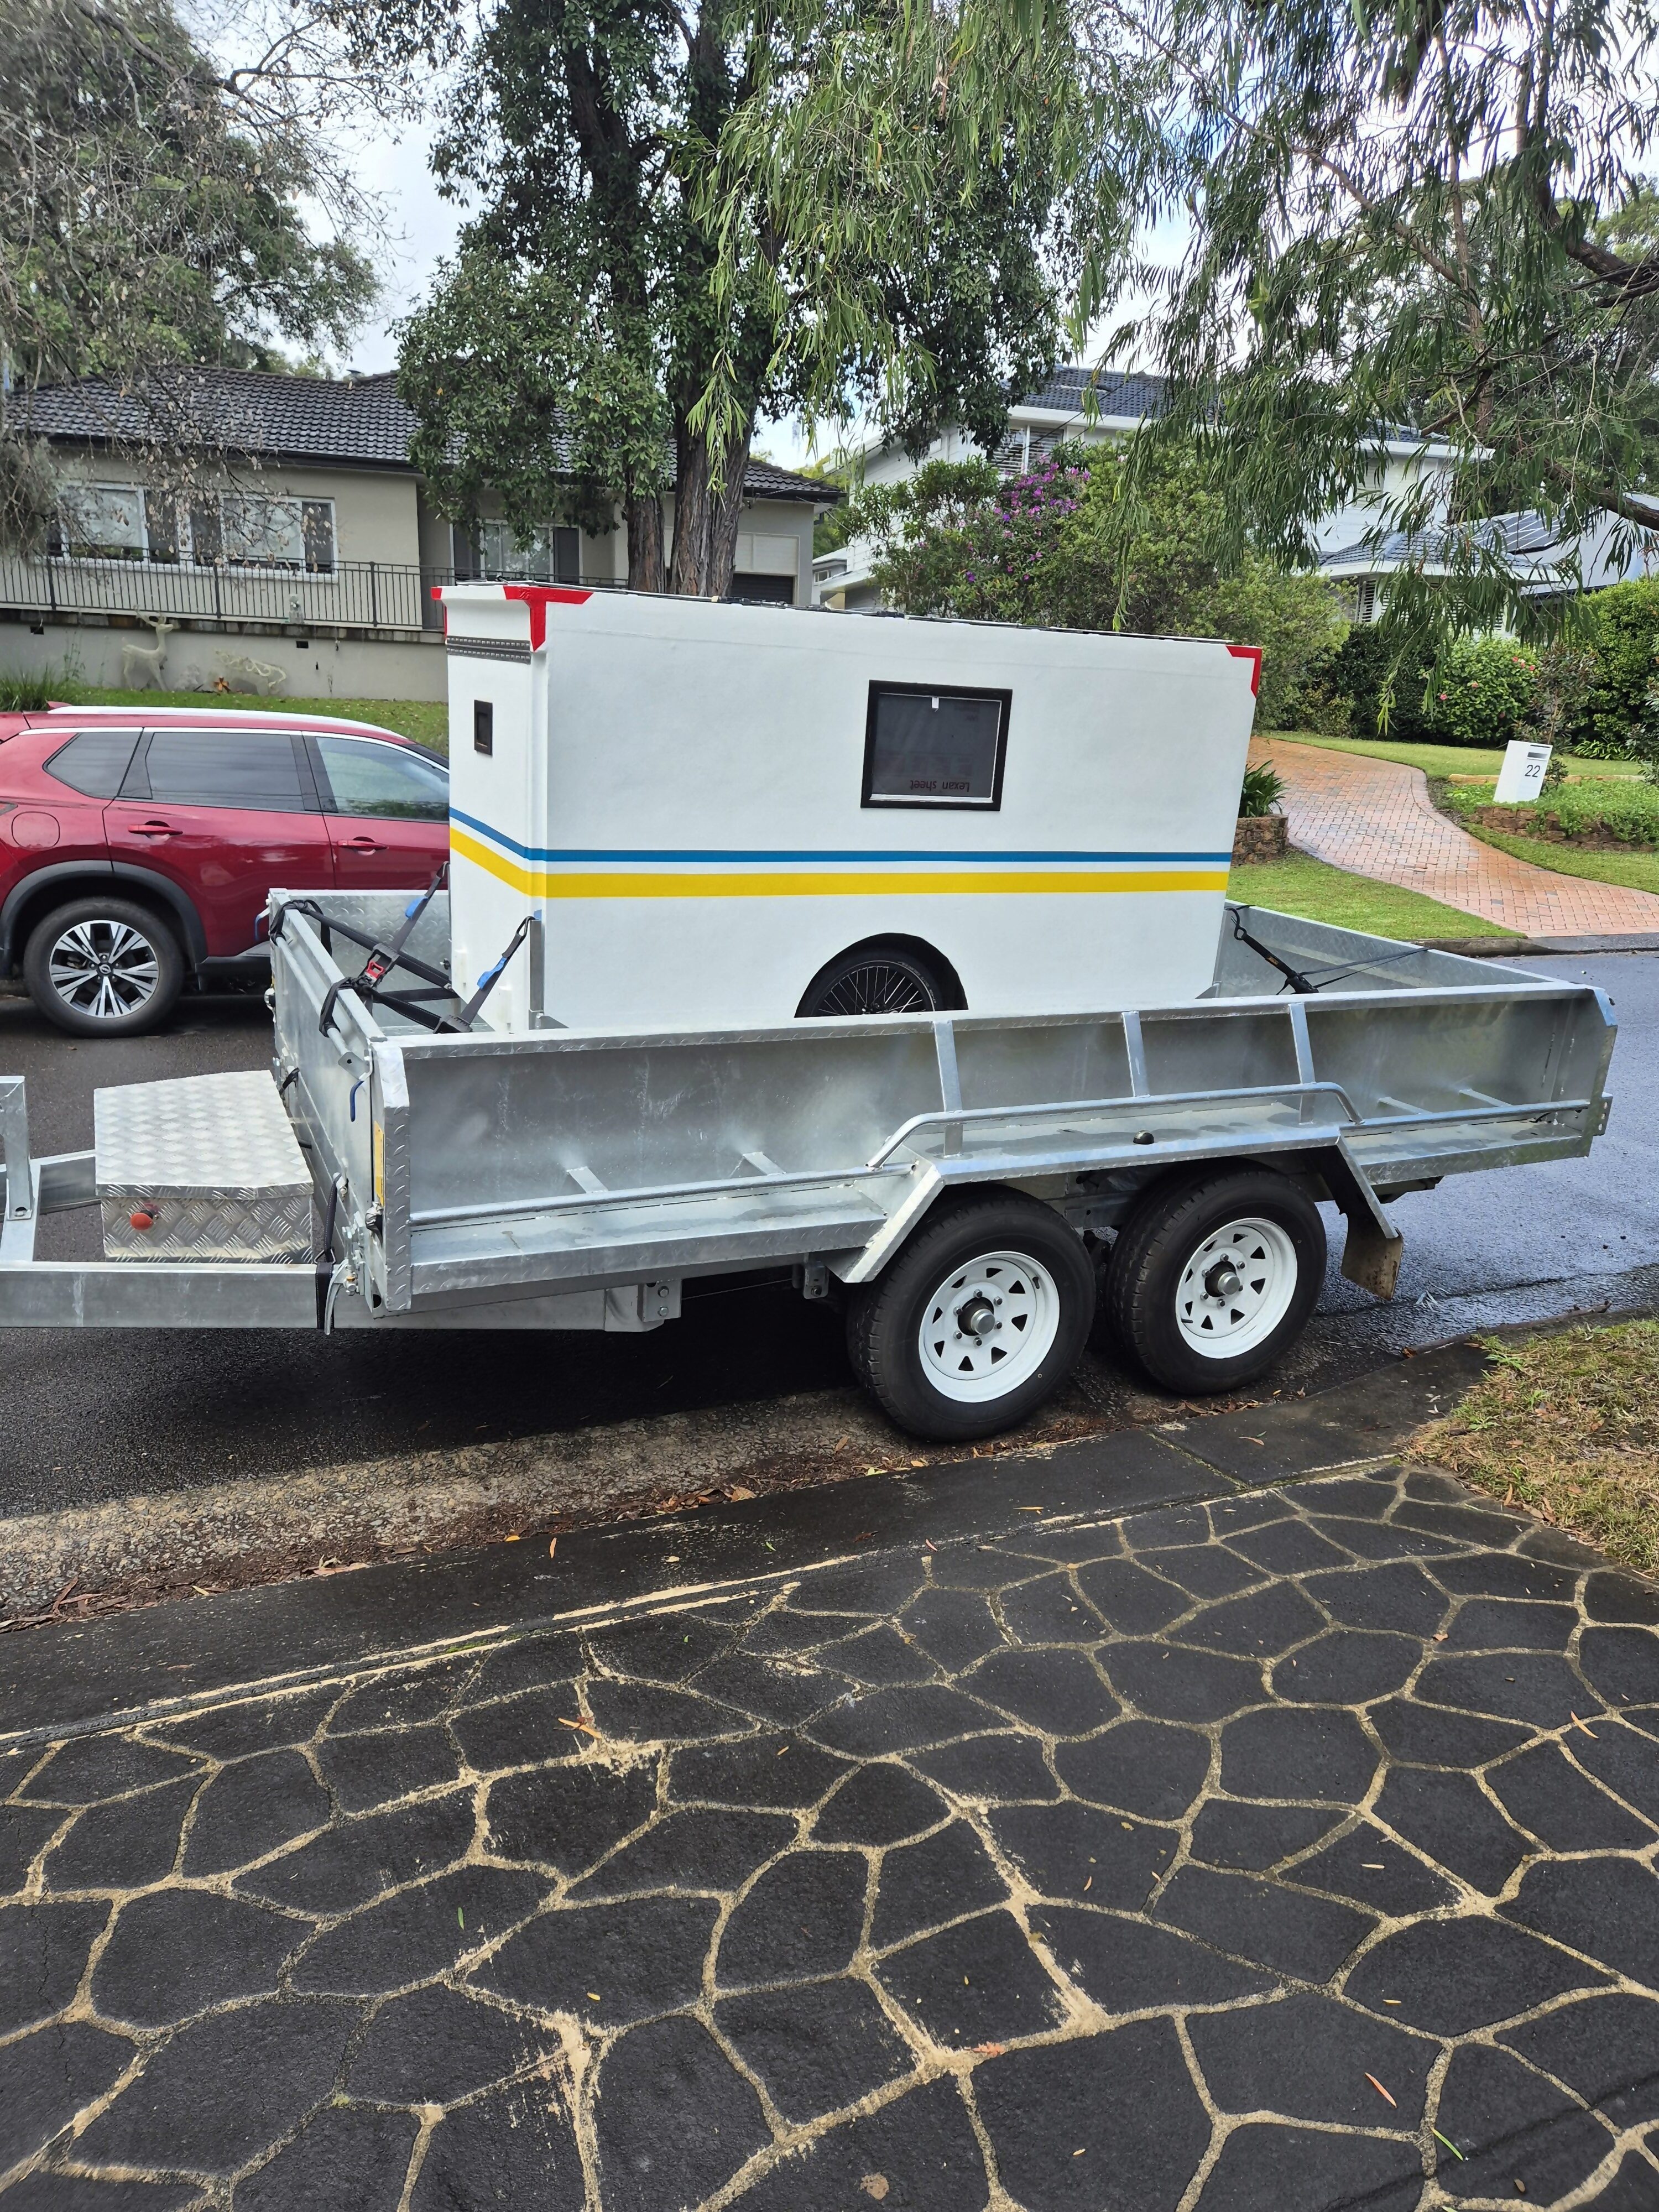
I reluctantly decided I needed to sell my caravan. Without the ebike or the trike I couldn't move it easily. It's too heavy for me to move it with pedal power only.
The weight is 71kg with the bed box and mattress. 58kg with them out. The 270w of solar panels on the roof are about 10kg. They are glued on. The electrical box is excessive without the 48v charging system.
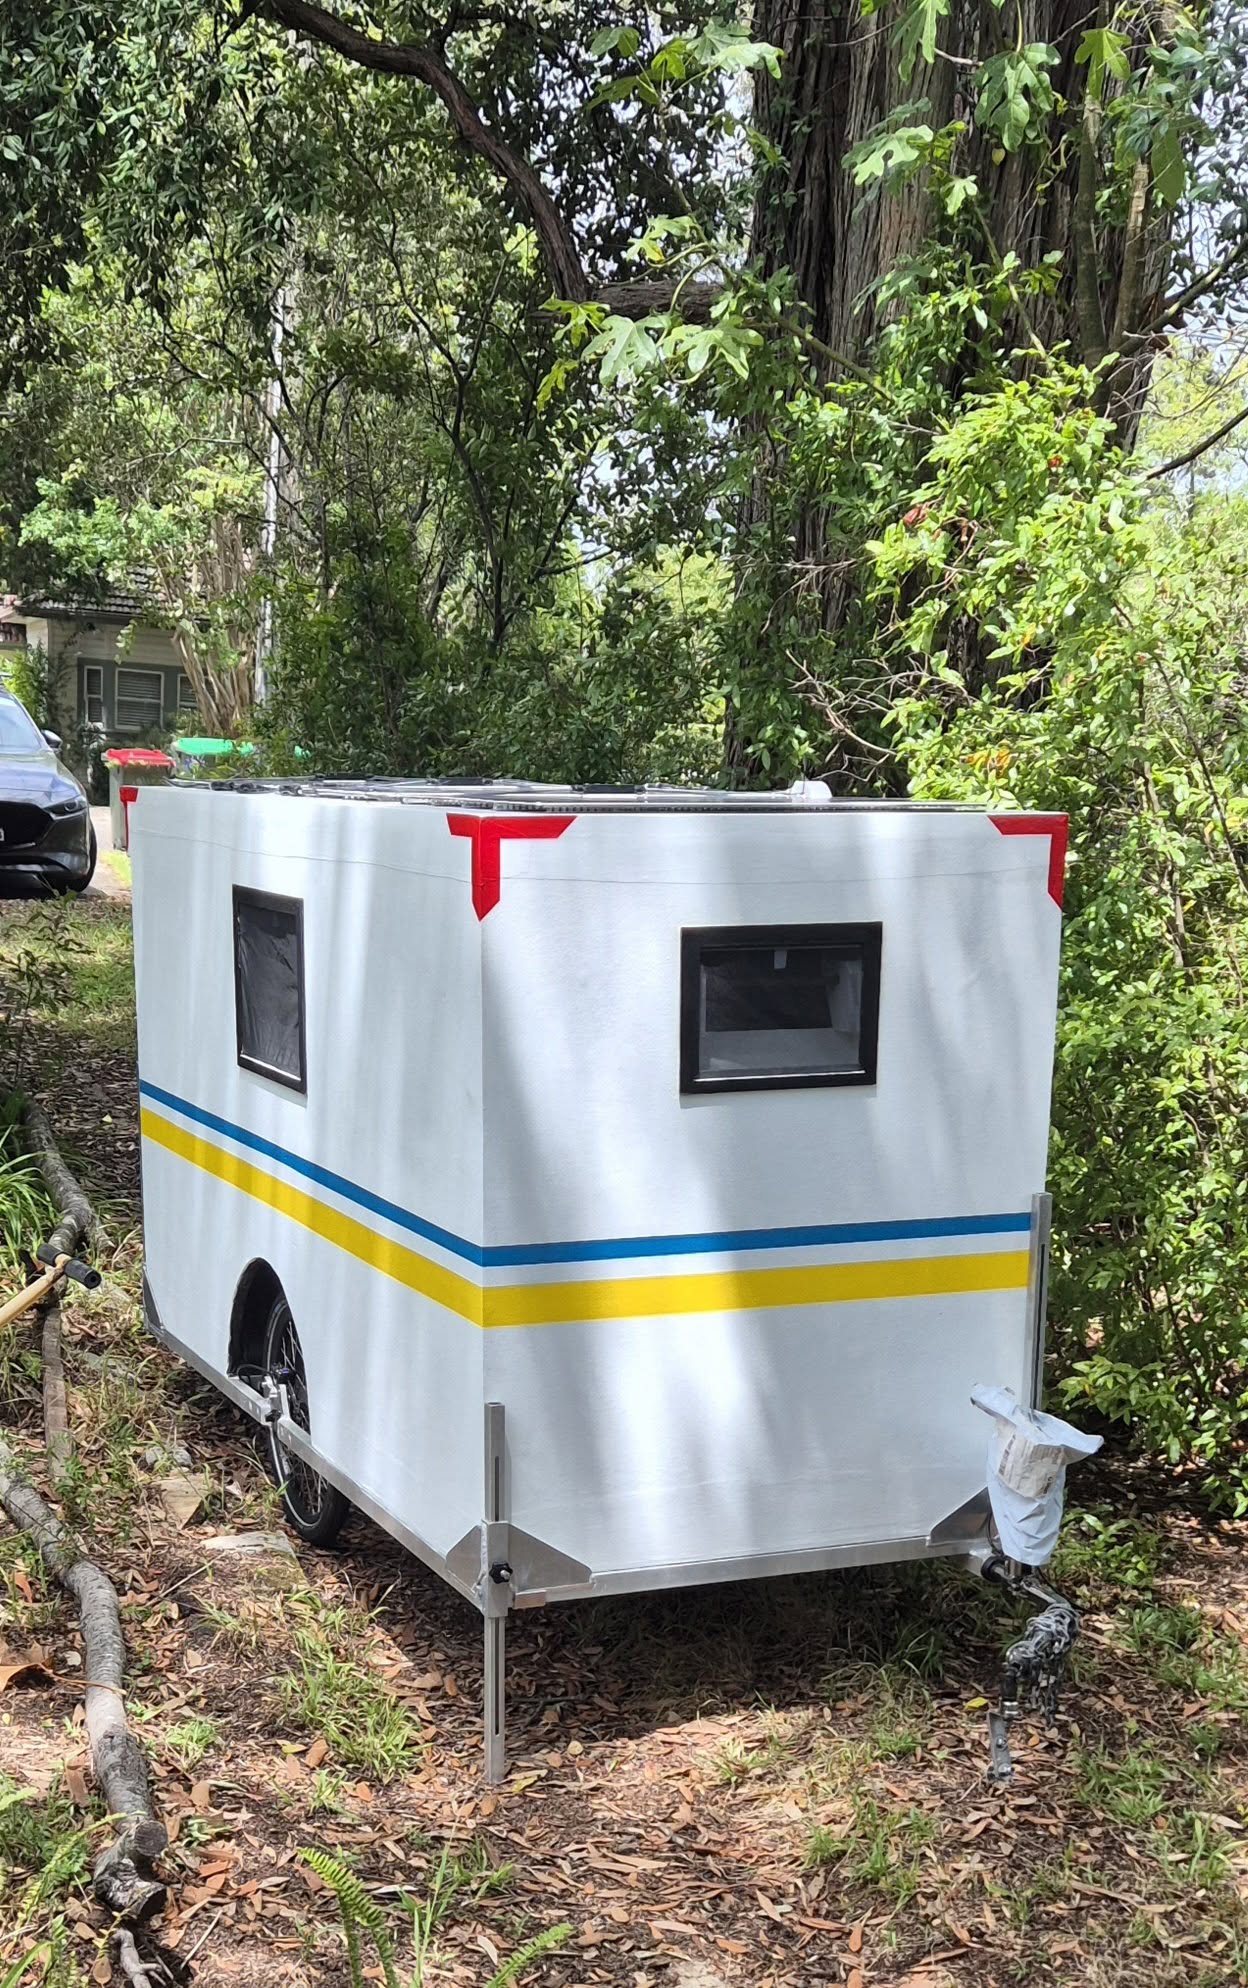
External: 2200mm L, 960mm w, 1400mm high.
Internal: Bed is 1820mm long and 630mm wide. Floor to ceiling is 1070mm. Hight over the bed: 900mm. Bed base is removable.
Cabin can be unbolted from the chassis. Chassis is welded aluminium. Cabin is 30mm XPS, with PMF.
Widows can stay open in the rain. They have multiple positions. Fly screens. Right side window has dual fans fitted. Fans are reversible. I leave them running 24x7 to have airflow through the cabin. There is an excess of solar on the roof to charge the battery even without direct sun.
Hitch is a single sided left side arm, connect to the bike axle.
Hydraulic disk brakes. Manually activated by rider.
If someone is inclined and has the ability, they could connect it up to an ebike and tow it, but I think it'll probably suit someone that wants a tiny house.
I want to build another: lighter!
I advertised it. Got a lot of interest. And then it was gone.
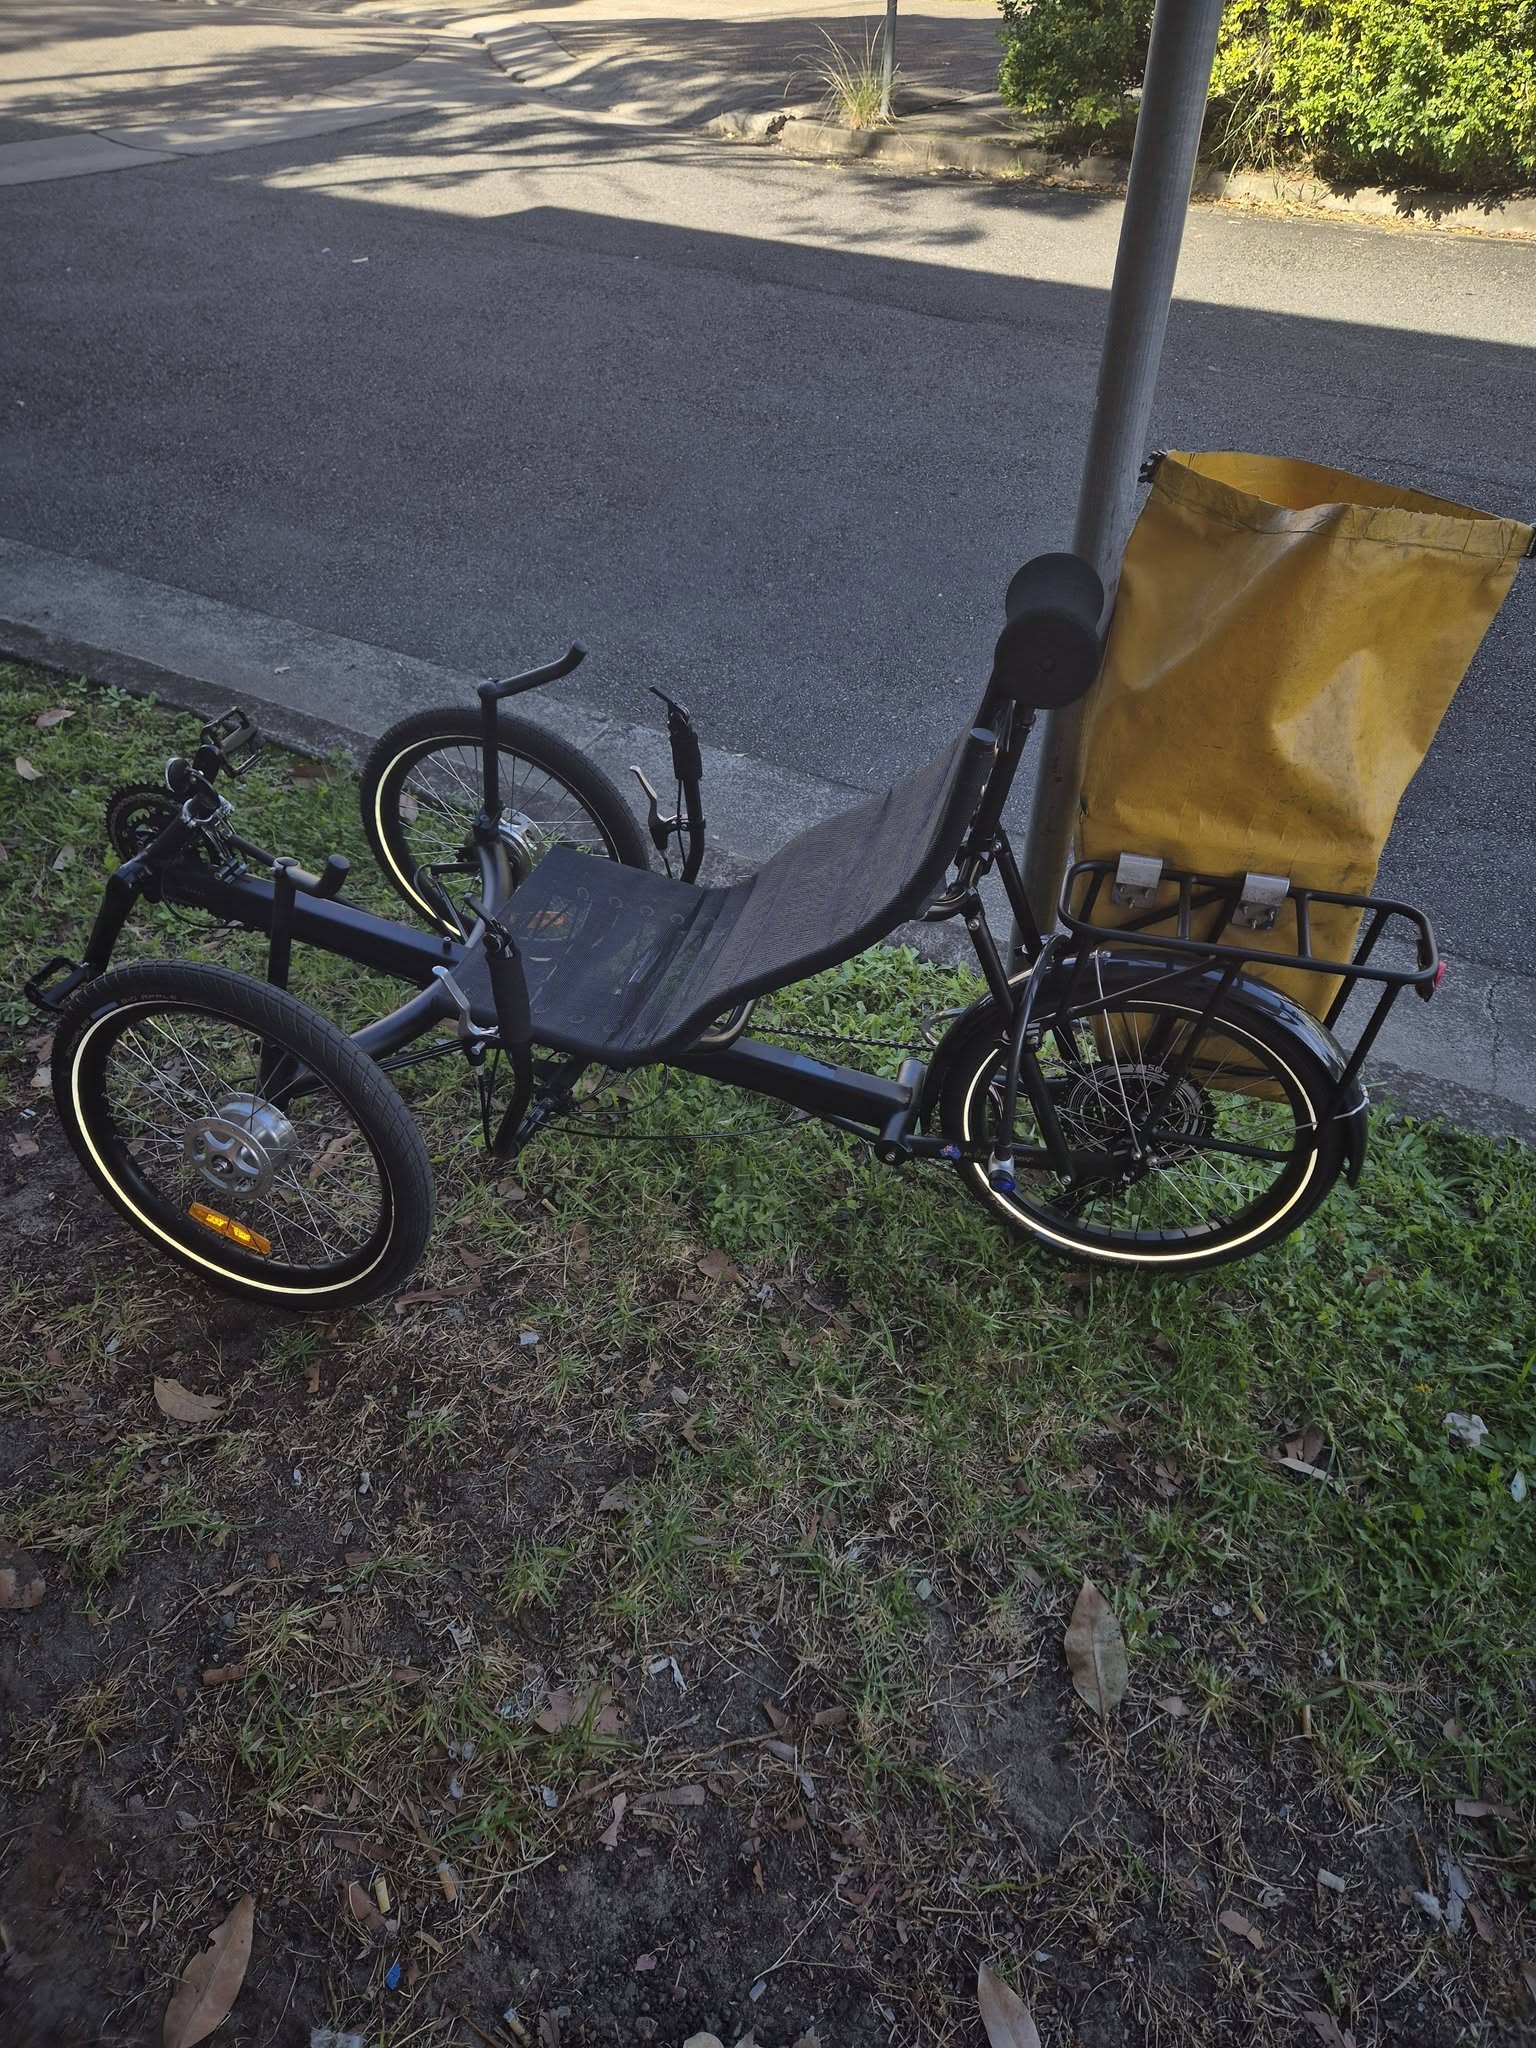
After riding the trike for a few weeks, I had to admit to myself that I couldn't see it as my every day bike. Yeah, there are times its heaps of fun, but mostly it wasn't working for me. Carrying it up and down stairs. Lifting it up and down paths without ramps, or the ramp is just too narrow. Lifting it between bollards and other obstructions too narrow to pass. I missed being up higher and seeing further a head on the road. Looking up at truck and lifted 4x4s. I missed being able to walking and pushing my bike. The trike is made for riding, not pushing.
Lots of angst about if to sell it or not. A coupled problem was how to move the caravan without the trike. Eventually I decided to rip the bandaid off and listed the trike for sale. Decision made.
Sold it to a lovely couple that only ride trikes. It'll have many happy adventures with them.
The caravan as it is currently is at an end. I've been sleeping in it since December, and love it. I really don't want to part with it, but I can't keep it as it is. It was started when 500 watt ebikes were legal. Build decisions were based on the need to have solar on the roof for charging and a 48V charging system inside. With no ebike and now no trike, the caravan is just too heavy for me to shift with a pedal bike.
I'm exploring options on what to do with it.
I'll sell it as is, or just the cabin and keep the trailer to build a new cabin on top of, or worst case it all gets scrapped. I'm hoping to avoid that.
Been feeling unsure about my caravan setup. I know people are using unpowered trikes with heavier caravans than mine. But reading about it and having your own working are two different things.
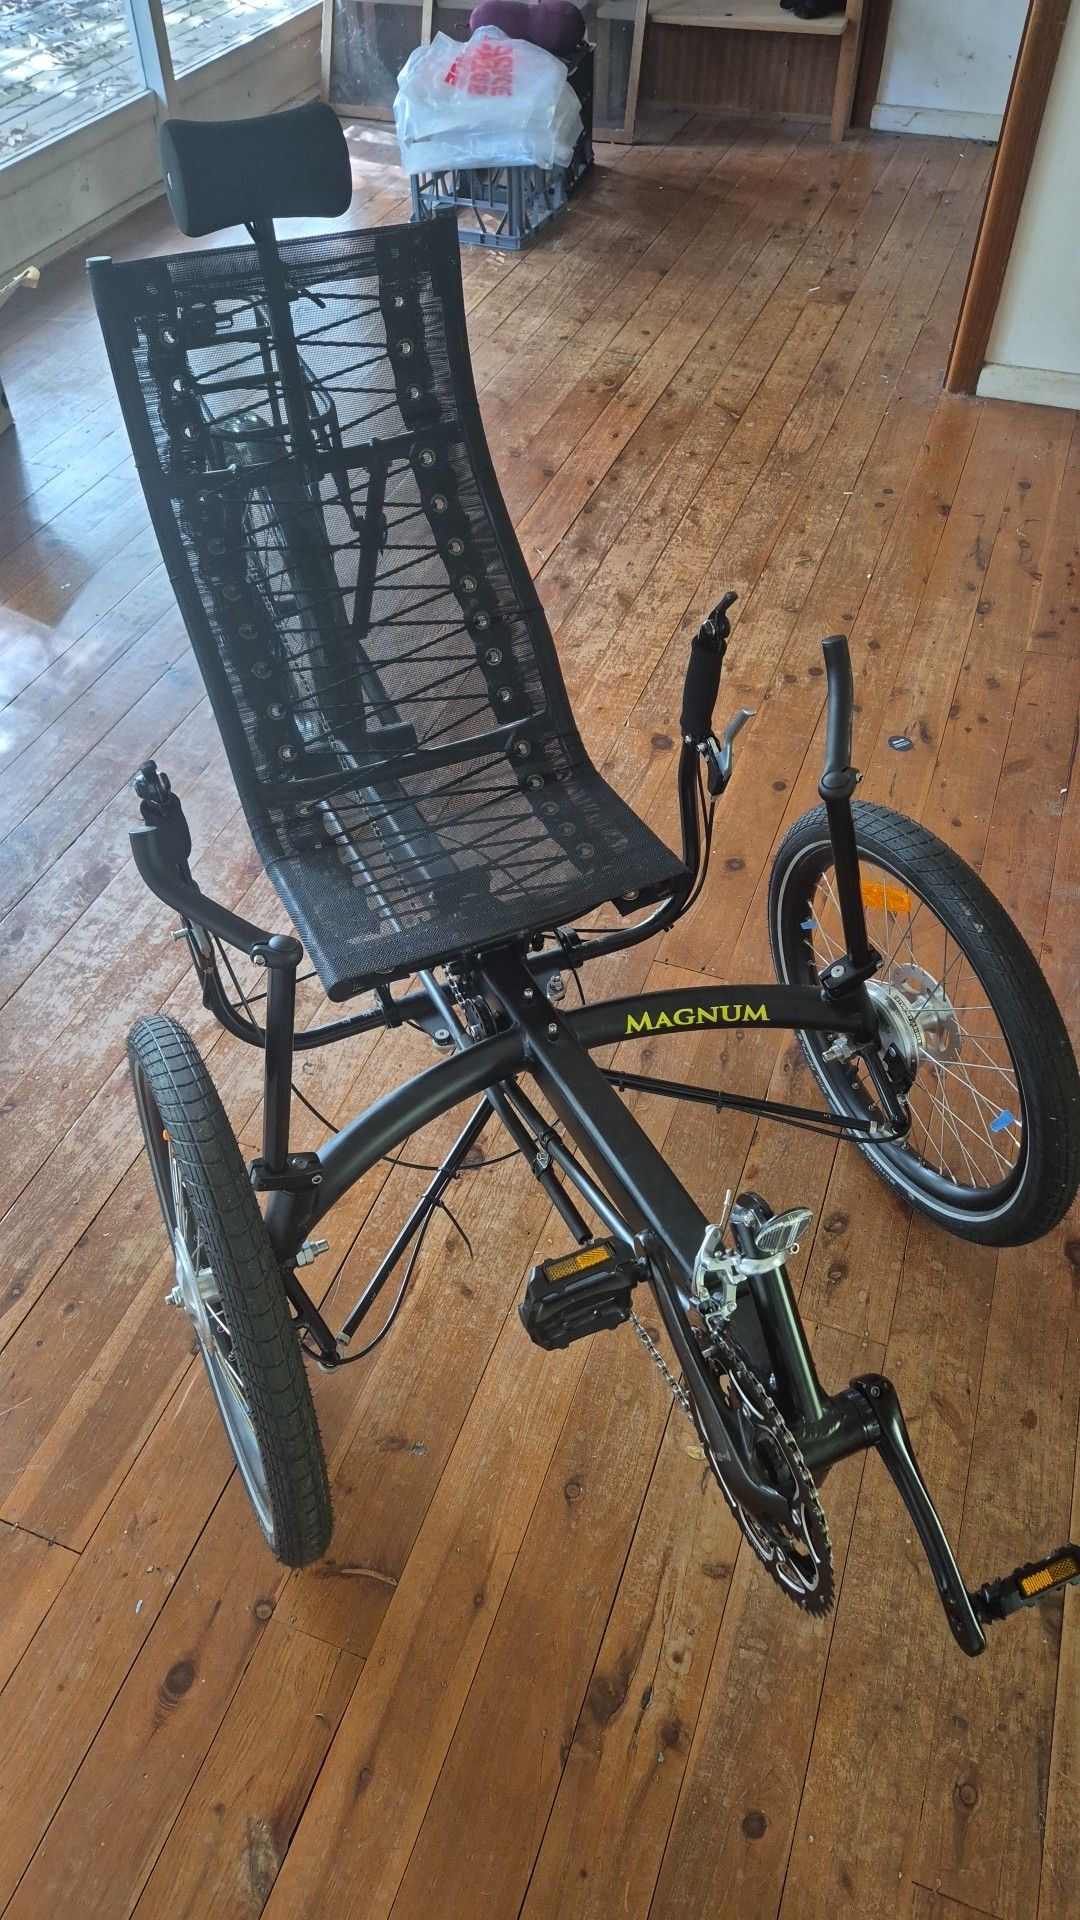
Despite having the trike for weeks now, I've hardly ridden it. With the hub gear it was insanely high geared. I couldn't pedal it up slight rises. As I was living at the bottom of a large hill, I only did a few circles on the road in front of the house.
I fitted a new rear wheel, with a 11-50 cassette. The bottom bracket needs to change to get 22,32,42 chainrings. Currently it's using 30,42,52. I also want to get a 12T on there for a quad chainring setup. Was waiting for that to get done before using it.
Today, decided that I needed to ride it to help settle some of my worries about using it with the caravan. I'll need to ride it next week to finish an adaptor for the caravan hitch. So after a bit of tuning it up, I took it for a ride to the shops. Chain isn't adjusted right yet, but I can access most gears. More than enough for day to day use.
Riding a trike is heaps of fun!
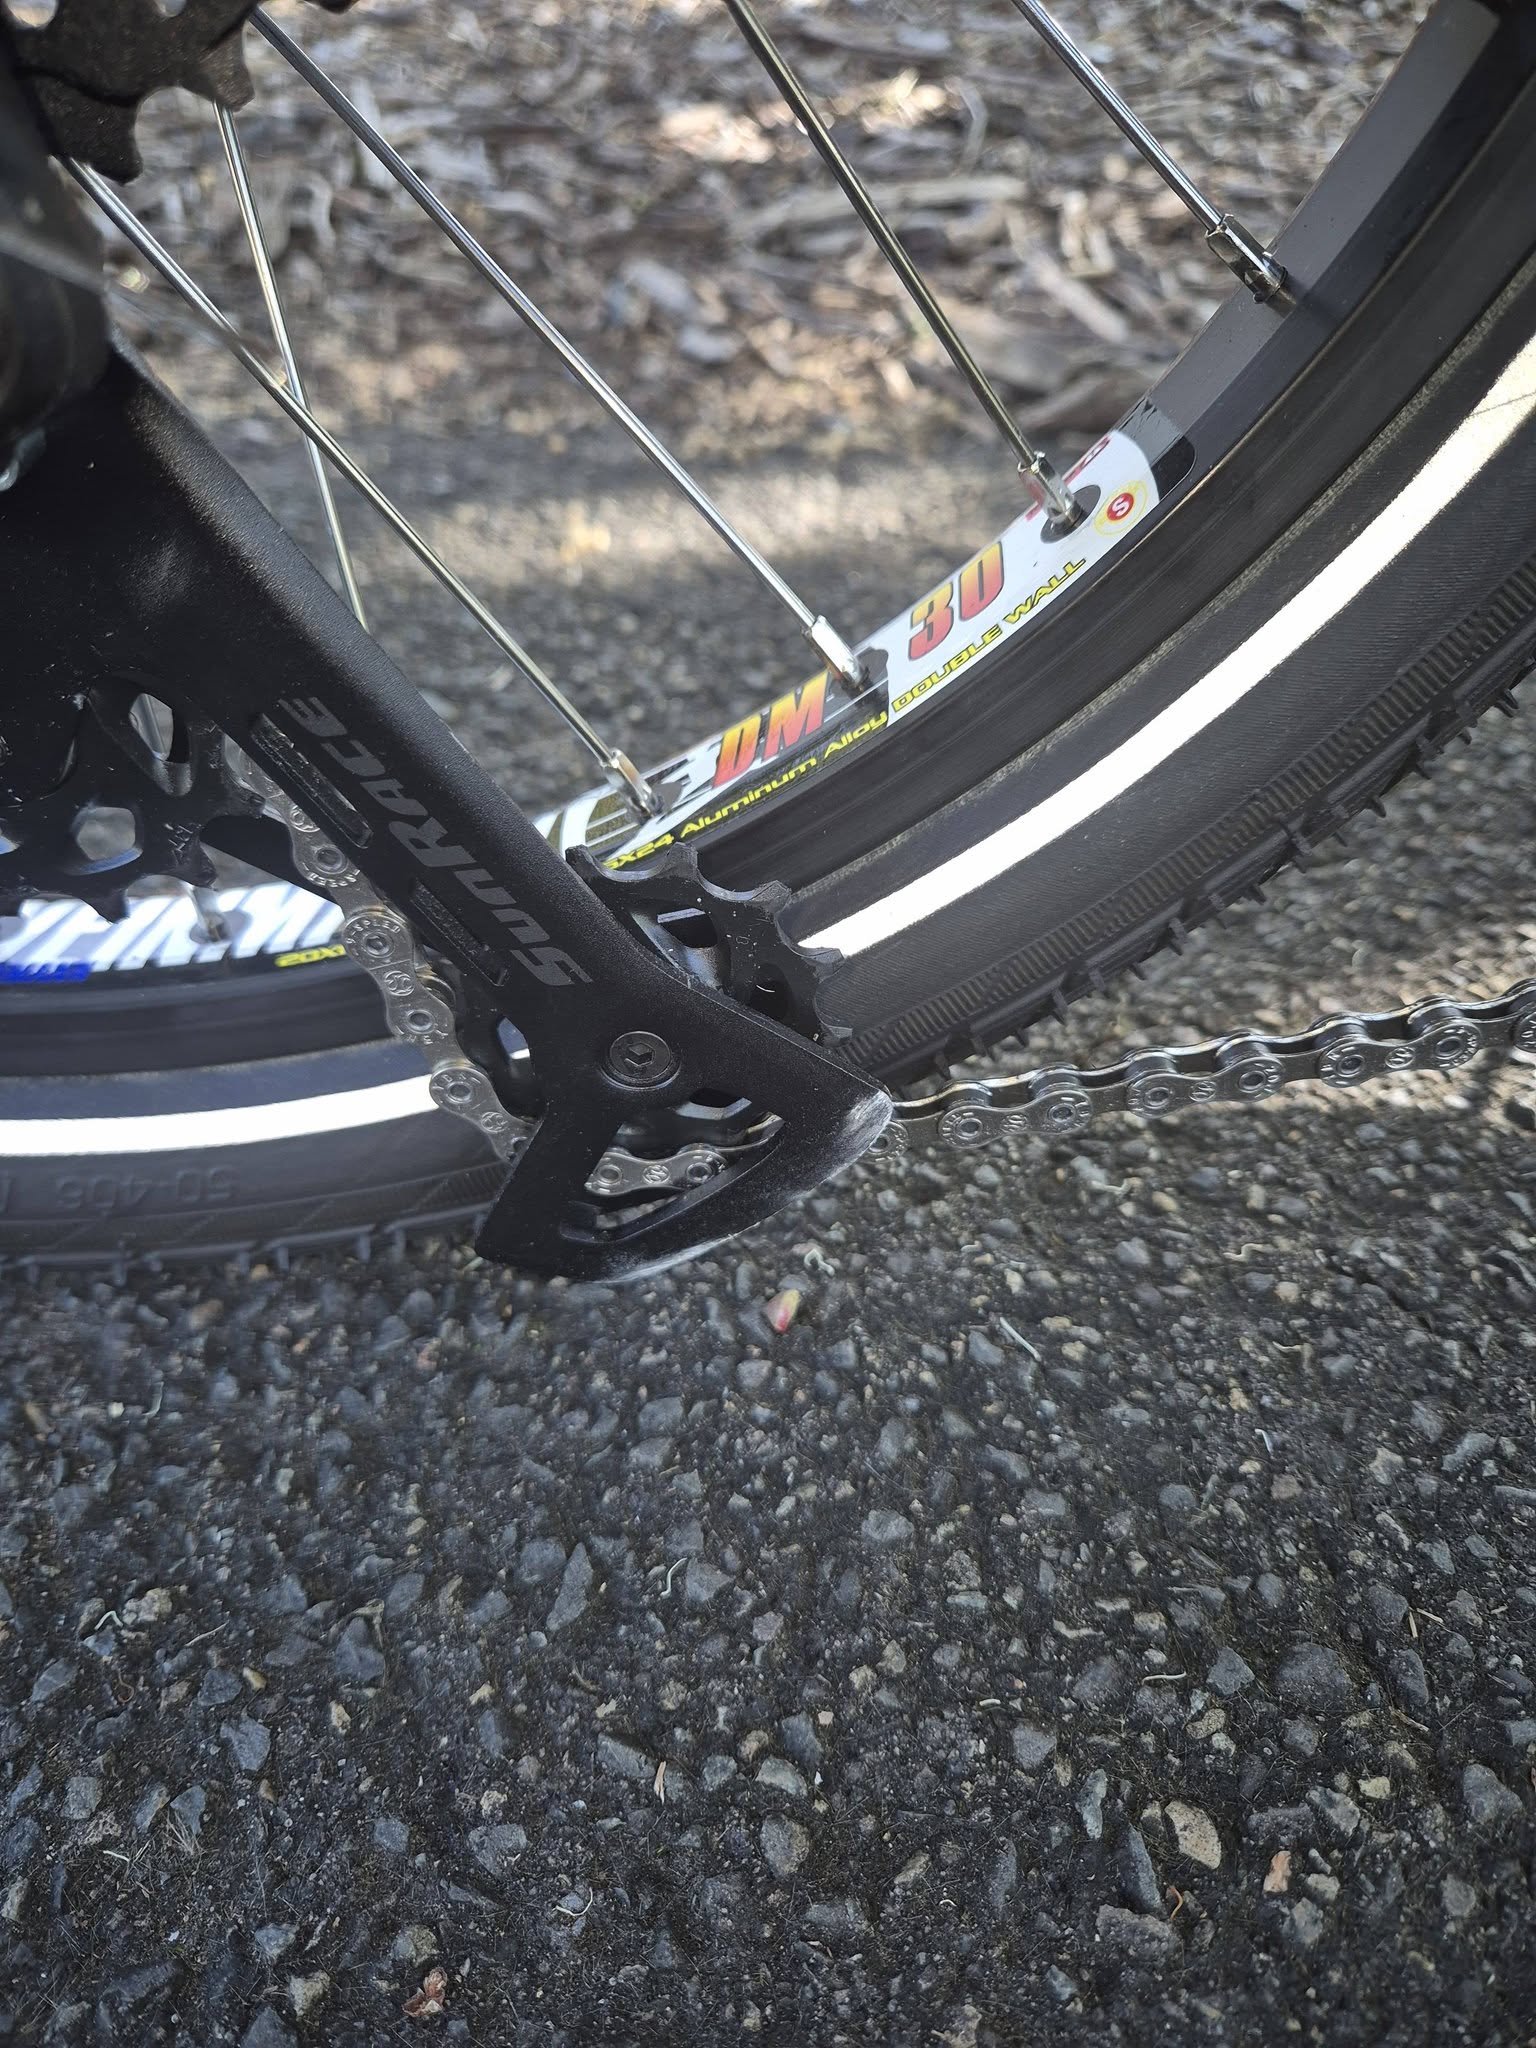
A new doubt: how long the derailleur is going to last. After the first few scraps, I take more care. But lots of uneven surfaces around here and it keeps getting hit.
Been a while since the last blog post, but progress hasn't stopped. If anything it has been in a bit of a frenzy of late. The current state: caravan still not 100% finished, but I don't think it never will be. It'll be continual tinkering.
The painting is finished. Pin striping is on. The original tape didn't stick. I vastly underestimated how long spraying the stripes on would take. Though, it wasn't the spraying as the masking that took so long.
Electrical panel was wired up and installed. Solar panels mounted and connected.
I've been sleeping in it since 19th December. That day was a 40°C. The house (brick and timber) heated up and retained the heat. The caravan heated up with air temperature, but as it has zero thermal mass, as the sun went down and the air temp dropped, the caravan cooled. The house was much slower. It was cooler in the van. I do have a ventilation fan on one window, but just having the windows open was enough breeze to feel cool sleeping.
By sleeping inside it each night, I've opening/closing the door a lot. Some of the discoveries from this:
Three wheels would have been a better choice. Anything I can't reach from the open door, that needs me to step inside needs the back legs down. If I need anything from the front, the front legs need to go down too.
Even for just putting them down once, there is an amount of fussing. I added a bubble level to help with leveling.
Two locks on the door got old fast. Two locks on the outside and two catches on the inside. The door needs it, but one would be much more user friendly.
The door opening upwards seemed a good idea. It does double as an awning when it showers. The door doesn't have support struts, but I do have some supports I can put under it to hold it up was an awning. But that doesn't happen as often as it is get in/get out, or open and get something in/out and close it again. I lift it enough to slip in/out from the side. Or if I need to get rummage a bit, it rests on my back as I do so. In the future I may redo the door to a barn door configuration with one lock.
I made the van a little too short. 30cm more would have been a bit cramped getting in and closing the door without being on the bed.
I thought I'd sleep with my head at the door end, but ended up liking the other way around. This meant the shelf that my feet were to go underneath was too low. I banged my head on it a few times. It was the first change next day: cut the shelf out and the repaint the wall. I've come to thinking that the shelving I have would be better as soft bags or nets hanging on the walls.
The bed is 630mm wide, but with the wheel wells and shelving beside it, there is no room to push off the sleeping bag to the side. The bed is effectively in a well. The sleeping bag is either stuffed to a side, pressing against my back or pushing over my legs/front, or, pushed to the end of the bed. Lately I found that stuffing it in a bag is better. Keeps it bundled up taking up less room even if its down where my legs are.
The electrical panel has a surprising amount of lights: blue, orange, green and red. So bright, I haven't needed an inside light. New to me the first night was that some of them flash. All night. I'd never noticed in the day, but at night, it's very noticeable. I'm still using the temporary fix of hanging a shirt over it each night. One day I'll make a better cover.
It seemed a good idea to have the electrical panel face the bed. Sit in bed, turn the switches on/off, see the voltage/current/power meters and plug in devices to the USB and cigarette lighter socket.
Reality is that I don't need the switches very often. Most things have another switch closer to the business end, or it doesn't matter if they are turned on/off. eg. the ventilation fans, USB devices. I leave the fans on 24x7. The meters, I looked at often on the first few days, but rarely look at them now. The battery drain is so low, and I've so much solar, that even on overcast and rainy days, under the trees, the battery fully recharges.
The UBS/cigarette access was a major pain point. I couldn't leave anything plugged in over night as the plugs in stuck into be bed space. Turning over could catch the lead or plug and break it. Anything plugged in really wanted to be on the bed. I still use the sockets when I'm awake, but I installed a cigarette lighter socket and USB plugs on the forward and backward sides of the panel for when I want to leave things plugged in over night. There is shelf space in front and behind to leave devices, rather than on the bed and the cables are out of the bed.
The roof was extremely loud in the rain. Light rain was okay, but heavier showers, it was unbearable. I'm parked underneath some trees and larger water drops drop from the branches. They manage to make a loud cracking sound. The raised solar panels are okay, so it was only the strip around them that was the problem.
With testing, a piece of fabric is enough to break up the drops to deaden the noise. I wanted green velvet but type I got was too thin. I found a piece of cream corduroy. It works to deaden the noise, but I'm not sure if it will remain. I'll leave it on for now and monitor how the water drains and if it drys enough to not become mouldy.
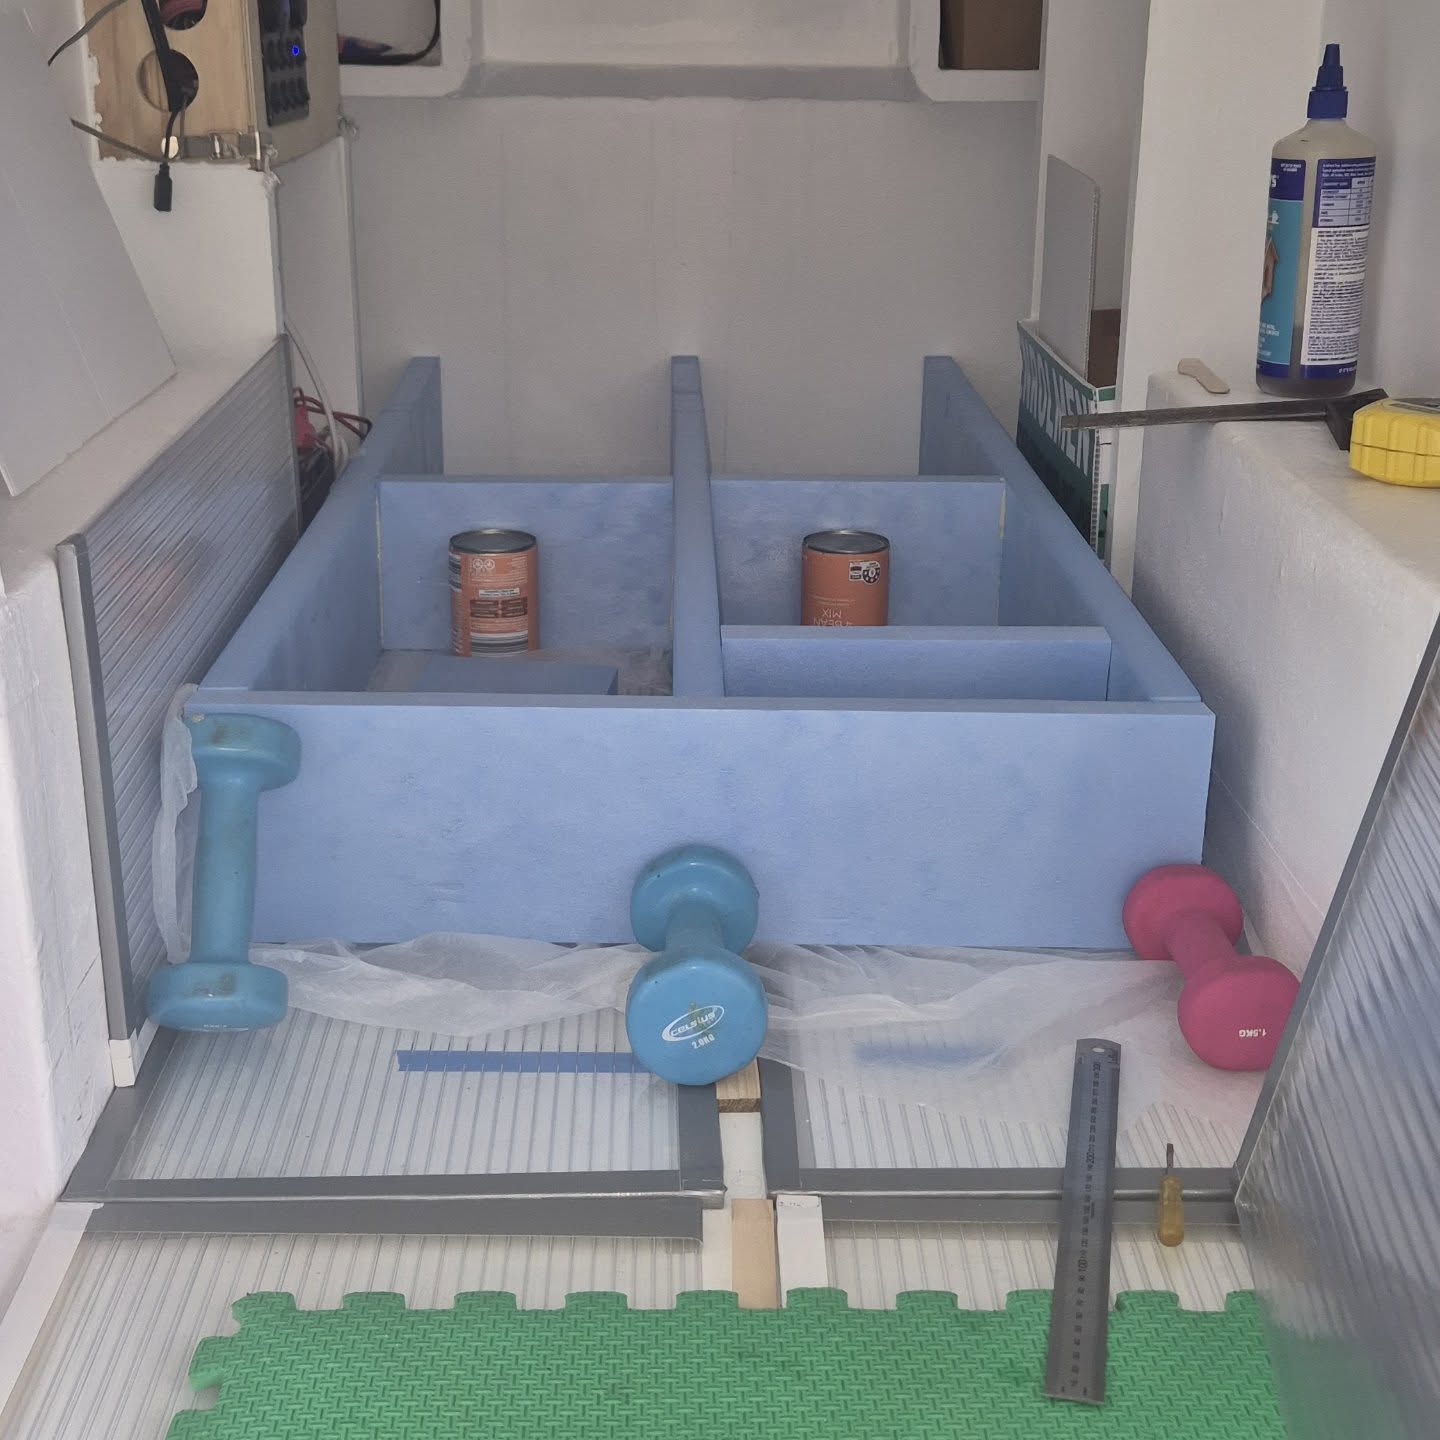
The bed! So many problem with the bed. It was terrible for storage underneath. When I cut the original height down, I thought I was clever by making it 110mm high - the height of a tin of beans. I was thinking that tinned food could be also be the bed top supports. But too many things are taller than 110mm. So I had a storage problem for stuff I had planned on going under the bed.
The bed creaked a lot. I laminated it with paper rather than fabric like the rest of the caravan foam. But the paper with glue/paint become very stiff and hard. No give at all. The polycarbonate bed top and floor creaked when it rubbed on them. I could have fixed this, but I made the base a tight fit between the wheel wells and shelving. More creaking points. and as the fit was so tight, no space to put anything to stop the rubbing.
New bed base fixes all these and more.
When I planned the caravan, I took a quick look about on online for solar panels. I saw that a 100W panel was about 1m long. The next size up was about 1.5 or 1.6m long. That was the basis for the caravan. If I'm committed to 1.6m, when my tent is 1.9m long, why not sleep under the solar panel?
A few months ago I looked quickly on Ebay and saw 300W and 400W panels. Small sizes too. Wow. This is great. Cheap too! I could get 4 panels on the roof. That's an amazing 1200 watts! I'll be swimming in power. Solar must have improved a lot. I was happy for weeks.
Then I went to order.
Money on the line, so I really dug into the details and specs to compare panels. A huge face palm moment. How did I not notice earlier!
I won't put a link here, but search Ebay and you'll find a lot of examples for cheap solar panels. I'm looking at flexible panels, but this also applies to rigid panels.
Taking one example on Ebay, advertised as 400W for $136.99. Looking through the nice pictures, lots of claims of high efficiency. High conversion rate. Panel size is 960x670mm. Nice and small. The seller has a lot of sales. High ratings and good reviews.
Scrolling down to "Item specifics" to get more details is the first hint of something not quite right.
Power: 201-300W Charging Mode: PWM (Pulse Width Modulation)
Connector Type: MC4 Wattage: 300-399W
Power versus Wattage? What's this about? Both given as a range, but it is advertised as 400W. What would I really get out of it?
The panel is using monocrystalline cells.
Solar Technology: Monocrystalline
Googling, the top result: Monocrystalline cells are rated at 15%–24% efficiency. Looking at other results, 15%-20%, 15%-23%. Note this is for the cell. After you encapsulate it in plastic the rating will drop. But then searching for solar panel efficiencies, I also find 15%–24%. Cheap Ebay panels are unlikely to be 24%.
Standard Test Conditions (STC) are the industry standard conditions under which all solar PV panels are tested to determine their rated power and other characteristics. When a panel is advertised as having a capacity of 350W for example, this is the power it is expected to produce under STC.
It tests a cell at:
Cell temperature: 25°C
Irradiance: 1000 W/m²
Air mass: 1.5
This is the cell, there are other measurements that give a more real world data for a panel.
But taking STC, and using the 1000W/m² and a low and high efficiency value, we have:
The panel size is: 0.960x0.670m = 0.64m²
Panel Wattage = Solar Irradiance x Area x Efficiency
Low efficiency: 15%
= 1000 W/m² x 0.64m² x 15%
= 96 W
High efficiency: 24%
= 1000 W/m² x 0.64m² x 24%
= 154 W
96-154W is a long way from the advertised 400W. Not even close to the 201W power rating either.
But I might not get even that. That was at 1000 W/m². Using the solar radiation in Sydney. On the day I was doing the calculations, the maximum was 961W/m² at midday. The average of 10am to 3pm was 833W/m². The day average was 569W/m².
Running the numbers again this time using 15, 17, 20 and 24% efficiency for the hours of the day. How many watts at the different hours at an efficiency.
October 28
Sunrise
06:00
Sunset
19:18
Total
7398 wh/m²
Panel m²
0.64
Time
W/m²
15%
17%
20%
24%
07:00
144
14
16
18
22
08:00
376
36
41
48
58
09:00
594
57
65
76
91
10:00
777
75
85
99
119
11:00
901
86
98
115
138
12:00
961
92
105
123
148
13:00
826
79
90
106
127
14:00
771
74
84
99
118
15:00
763
73
83
98
117
16:00
612
59
67
78
94
17:00
445
43
48
57
68
18:00
213
20
23
27
33
19:00
15
1
2
2
2
What time you test and the efficiency of the panel matters. In the real world, that 400W panel is only going to give a maximum of 148W on that day if (and that's a bit if) it is 24% efficient and the temperature of the panel is 25C. Spoiler: It won't be 25C in the sun and it isn't 24% efficient.
All the high quality brand name panels I checked had Monocrystalline efficiencies of 17%, so using that, the 400W panel might give 105W at midday at most. Real world will be less. Flexible panels also degrade faster than rigid panels.
But all is not lost.
I created a spreadsheet of all the solar panels I was looking at. On and off Ebay. The off Ebay panels were by Renogy, Sunman and ATEM. Their specifications as advertised. Price, size, advertised watts, panel type, Voc and Vmp. I then calculated the watts at STC for all panels based on its size. No surprise, most Ebay panels were way less than advertised. But not all. All the non Ebay panels I included were better than advertised at STC.
I also calculated $/watt at STC for all panels. If area wasn't a concern this would be one deciding metric, but panel size was also important to me. I only have so much space on the roof. How could I get the maximum use of it?
With the different panel sizes, I could get between 1 and 4 panels. In the end, I decided on three Ebay panels advertised at 400W, but by my calculations are more likely to be 90W each. I got lucky that the seller was having a sale, so each panel ended up costing $70 delivered. There was a Sunman panel I really liked with watt output only slightly lower than the combined three I panels I ordered. But I could only get one on the roof and it's price was significantly higher. Annoyingly a couple of weeks later, they had a 60% off sale. At that price I would have purchased it. But too late by then.
I'm happy with the three I did order. All the reviews of flexible panels show they don't last as long as rigid panels. Flexing cracks the cells, lowering output. Over heating is a problem if they don't have an air gap underneath. As my caravan is insulating foam, I intend to mount them raised. So having cheap panels for a first go suits me. I think of it as an experiment to test the mounting system. When they fail, I'll know more about my usage and the mounting system. Then I might look at a more expensive options.
This year the caravan will finish! Well, finished enough to be in use. I'm not sure it will ever really be finished. Already I have a list of fixes, changes and improvements. But not now. The focus is on getting it done. Changes can happen later.
December was looking promising. I had lined up time with my welder friend to get some chassis fixes done. The brake caliper mount. Strength the draw bar attachment. Make the disk brake handle mounting seen in the previous post. I also lined up another friend to help with the electrical wiring. The best laid plans of mice and men often go awry.1 I caught COVID. There are no quarantine rules anymore, but I wasn't going to share the infection.
I did end up getting the welding done. And over the Christmas - New Year time, got the disk brakes mounted. The cabin got another coat of paint on the outside also. I've still more to finish and look forward to the Men's Shed reopening.
The delay for the electrics turned into a good thing. It was going to be two ebike batteries: one on the ebike, one in the caravan. Charge the one in the caravan, swap with the ebike when required. But the caravan battery needs to provide power while it is charging. The BMS in the battery I have doesn't allow that. If it is charging, discharge stops. A work around was to charge it via the discharge port, but I wasn't keen on that solution. I thought to have a small 12v battery for caravan supply, and charge that from the ebike battery or solar. Eventually I decided to have the caravan just use a 12v battery and skip the second ebike battery. I'll charge the ebike battery when I'm stopped.